Installing & Configuring Windows Server 2025

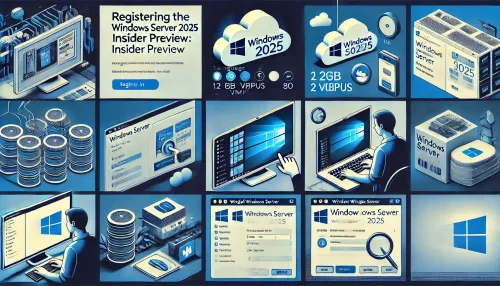
Windows Server 2025 is on the horizon, and as of May 2024, Microsoft has made the Insider Preview version available for early testers. If you’re eager to explore the new features and performance enhancements, you can get started by installing Windows Server 2025 on a virtual machine (VM) using QEMU virtualization on Ubuntu. This guide will walk you through registering for the Insider Preview, setting up the VM, installing Windows Server 2025, and performing key post-installation tasks.
Step 1: Register for the Windows Server 2025 Insider Preview
First, you need access to the Windows Server 2025 Insider Preview build. This version is available for testing purposes and provides insight into the upcoming features and improvements. Follow these steps to register:
Sign Up for Insider Preview: Visit the official Windows Server Insider Preview registration page. You must sign up with your Microsoft Account, Office365, or AzureAD credentials.
Agree to the Terms: After logging in, read and accept the terms and conditions to proceed.
Download the Build: Once registered, download the latest Windows Server vNext LTSC Preview (Build 26085) in English. This build will be used for your installation.
Step 2: Create a Virtual Machine for Windows Server 2025
For this setup, we will use QEMU virtualization on Ubuntu. If you’re using another hypervisor like Hyper-V or VMware, the process is similar but may vary in specific steps.
Install QEMU: On your Ubuntu machine, ensure you have QEMU installed. You can use the terminal to install it by running the following commands:
Copy code
sudo apt update
sudo apt install qemu-kvm libvirt-daemon-system libvirt-clients bridge-utils
Create a Virtual Machine: Open the QEMU tool and start the VM creation process. Allocate resources like RAM, CPUs, and storage to the VM. Here’s an example configuration:
RAM: 12GB
vCPUs: 2
Storage: 80GB (ensure there’s enough space for the installation)
Mount the ISO: Once the VM is created, mount the Windows Server 2025 Insider Preview ISO image to the virtual machine.
Start the Virtual Machine: Boot up the VM, and the installation process will begin from the ISO.
Step 3: Install Windows Server 2025
Now that the virtual machine is running, it’s time to install Windows Server 2025:
Select Language and Region: Once the VM boots into the Windows Server installer, select your language, region, and keyboard layout. Click Next to continue.
Install Windows Server: Choose the Install Windows Server option from the installation screen.
Skip Product Key: If you don’t have a product key, select I don’t have a product key. You’ll be able to proceed with a 180-day trial license.
Choose the Version: Select the version of Windows Server you wish to install. For this demo, choose Windows Server 2025 Datacenter Desktop Experience, which provides a graphical interface for easier management.
Accept License Agreement: Read and accept the terms and conditions, then click Next.
Select Installation Disk: Choose the virtual disk (80GB) you created earlier for the installation, then click Next.
Begin Installation: Click Install, and the system will begin installing Windows Server. This process should only take a few minutes.
Step 4: Post-Installation Configuration of Windows Server 2025
Once Windows Server 2025 is installed, you can begin configuring it for your needs.
Set Up Administrator Account: After installation, the system will prompt you to create an Administrator account. Set a strong password for security and finalize the setup.
Log In: Use the newly created administrator credentials to log in to the server. You’ll be welcomed to the Windows Server 2025 Desktop.
Step 5: Configure the Firewall for External Access
At this point, you may want your Windows Server to be accessible from external networks. By default, Windows Server has a firewall that restricts inbound connections. For this demo, I’ll disable the firewall, but note that in a production environment, it’s critical to configure specific firewall rules to secure your server.
Disable the Windows Firewall (For Demo Purposes):
Open Windows Defender Firewall from the Control Panel.
In the left sidebar, click Turn Windows Defender Firewall on or off.
Select Turn off Windows Defender Firewall for both private and public networks (not recommended for production environments).
Configure Firewall for Production: If this setup is for a live environment, configure appropriate inbound and outbound rules to ensure security. Consider allowing only certain ports (e.g., RDP or HTTP) and blocking unnecessary services.
Step 6: Run Windows Update
Before using your new server, it’s essential to update it to ensure all security patches and the latest features are installed. Follow these steps:
Open Windows Update: Click the Start Menu and search for Windows Update. Click on Check for Updates.
Install Updates: Windows will check for any available updates. Install any that are listed to keep your server secure and up to date.
Conclusion
Congratulations! You’ve successfully installed and configured the Windows Server 2025 Insider Preview in a virtual machine. You’ve also performed essential post-installation steps, such as configuring the firewall and running Windows Update.
Now that your server is up and running, feel free to explore the new features and improvements that come with Windows Server 2025, whether for testing, development, or preparing for future production deployment.
Remember, this installation is an Insider Preview, which means it’s a pre-release version. Use it in a test environment and not for critical production workloads. Stay updated with the latest builds, and enjoy testing the cutting-edge features Microsoft has to offer!
Read More: https://eliteenterprisesoftware.com/news/exploring-windows-server-2025-what-is-new-and-changed/

